With glyphs in Microsoft Word, you may find that the bottom and top of letters are being cut off. This is known as Font Clipping and can happen when using fancy styled glyphs. In this tutorial we show you a quick and simple solution to fix the problem.
Step 1:Type out your Text
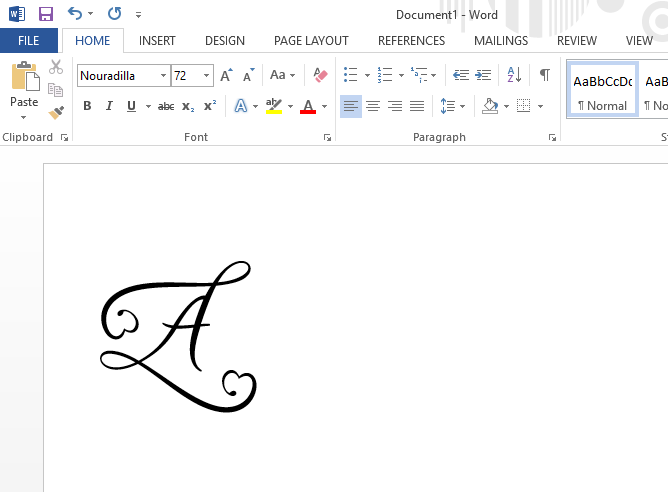
Once you have opened Microsoft Word, type out your text and add your glyphs.
As you can see, the top and bottom of the glyph for the letter “A” has been cut off in Microsoft Word.
 Step 2: Edit the Line Height
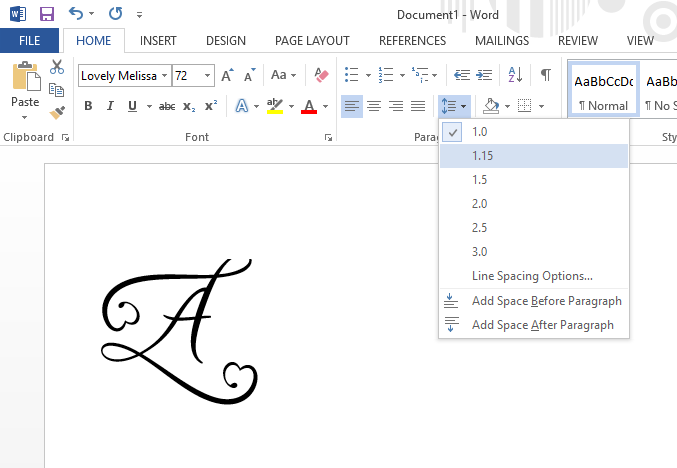
To fix this, starting with the bottom clipped edge, we need to adjust the Line Height. This can be found in the Line and Paragraph Spacing section top toolbar. You can select a number to adjust the height. Some fonts will need a higher value than others.

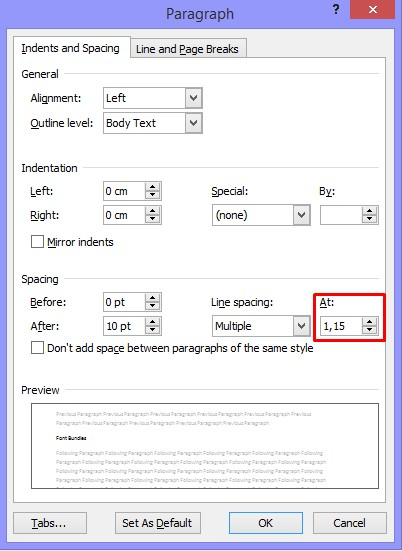
If you want to add a value, click on the Line Spacing Options under the Line and Paragraph Spacing icon. Then adjust the At: value bottom right.

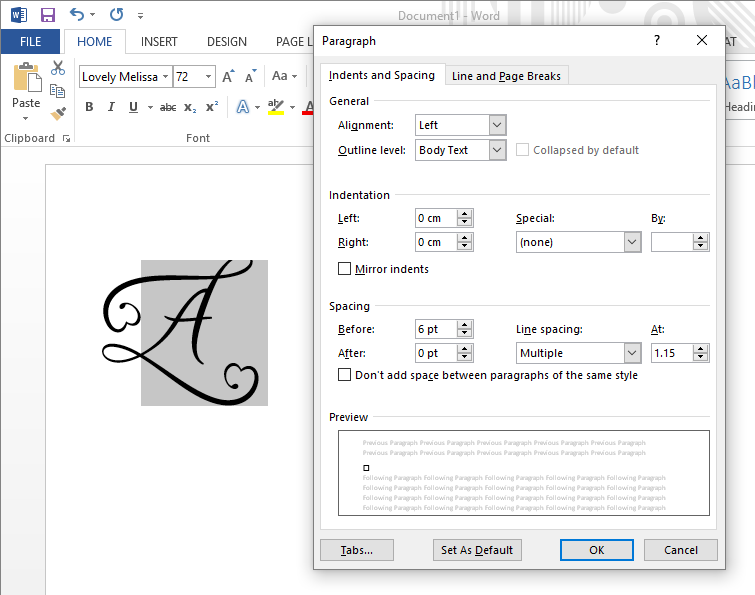
To edit the Line Height for the top of the glyph, click on the Line Spacing Options. Adjust the Spacing Before to a higher value then click on OK to see the changes. If clipping is still visible, change the values again and click OK.
If you find that your glyph is still clipping at the bottom, input a higher value in the Spacing After box.

The font glyphs should now be fully visible without any clipping, cropping or cutting.

We understand that font clipping can be very frustrating. We hope that this quick guide has been helpful in maximizing your time.


