Learn to create Sublimation Designs in Silhouette Studio in 6 easy steps!
Step 2 - Create the popsicle design
Select the Rounded Rectangle tool under the Drawing Tools on the left side menu. Draw the top portion as a downward rectangle. You can change the roundness of the corners by adjusting the two red dots at the top of the rectangle. Once the shape is as you want, select the rectangle then right click > Convert to path.

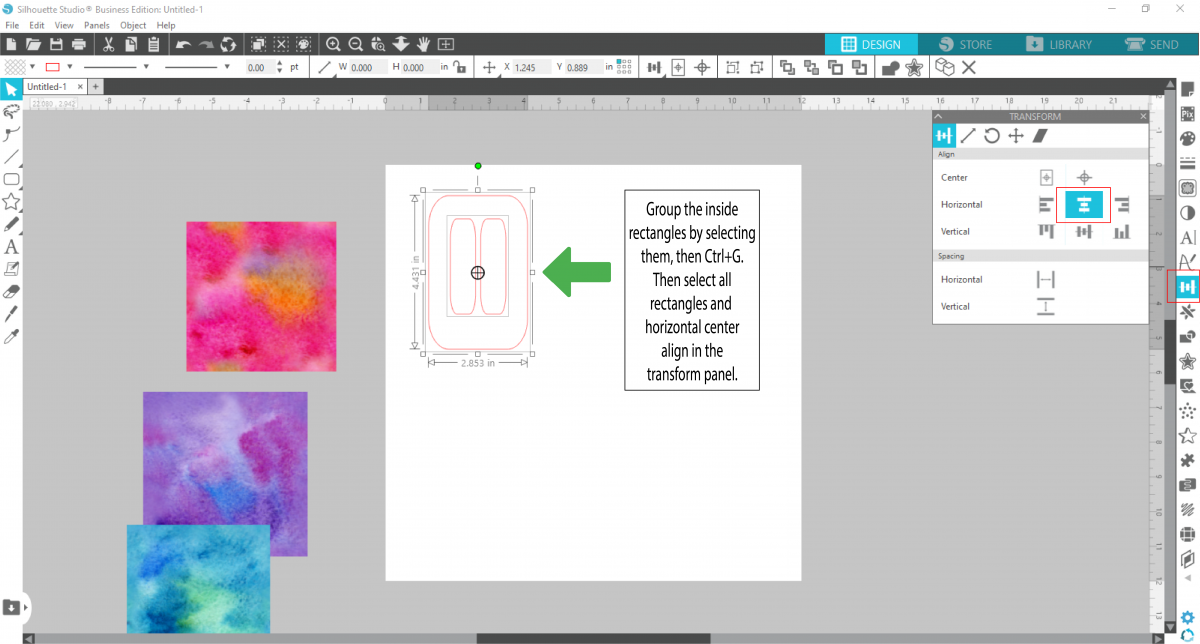

Step 3 - Edit the popsicle design
Always make a duplicate of the original portion that is being modified. Do this by selecting the top rectangle portion and press Ctrl + the right arrow key. This will duplicate it to the right.


Step 4 - Duplicate the popsicle design
Select the entire popsicle, then press Ctrl + the right arrow key. This will duplicate the whole design. You can use the arrow key to adjust the distance between each popsicle. Do this two more times so that you have three popsicles.
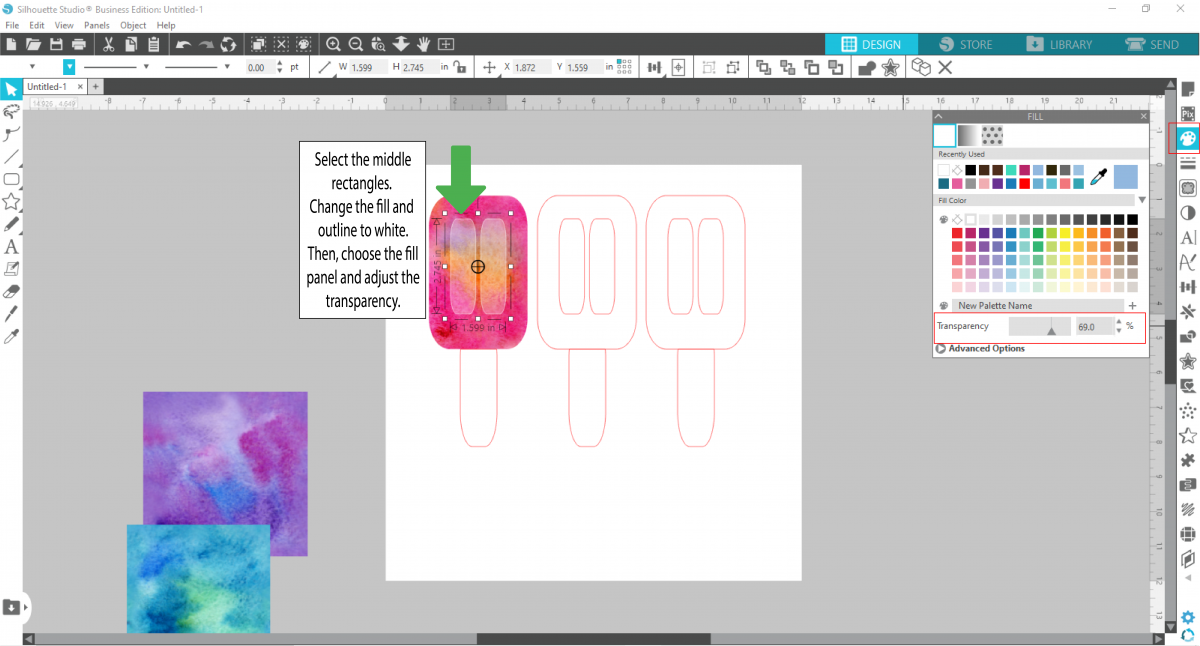
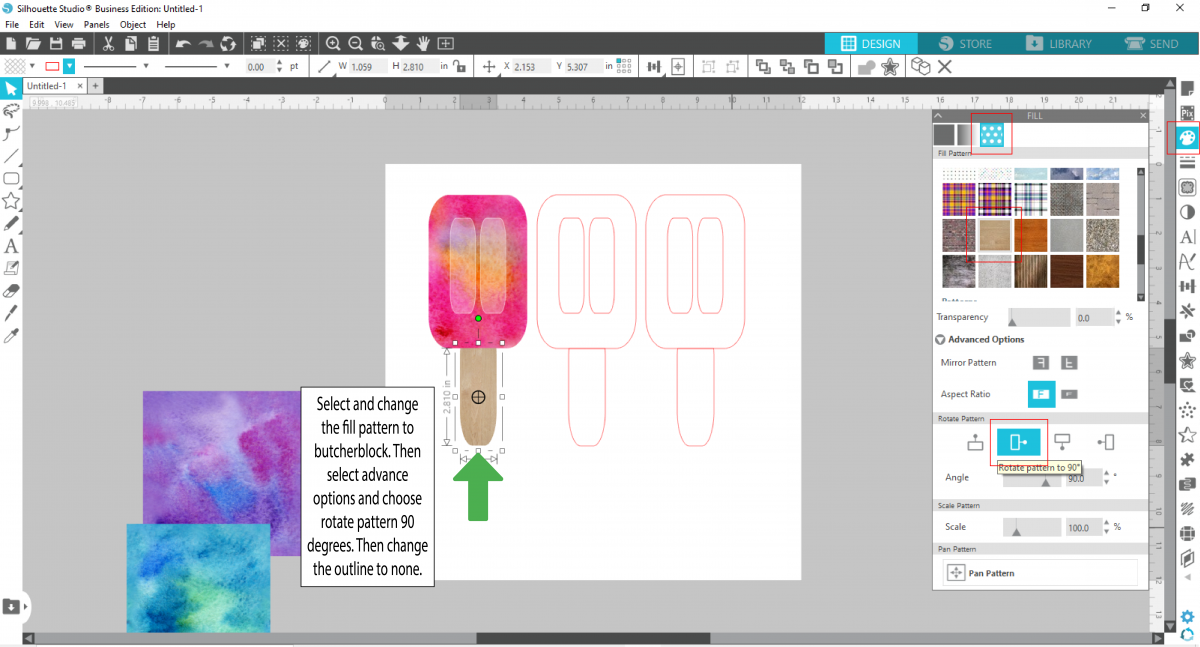
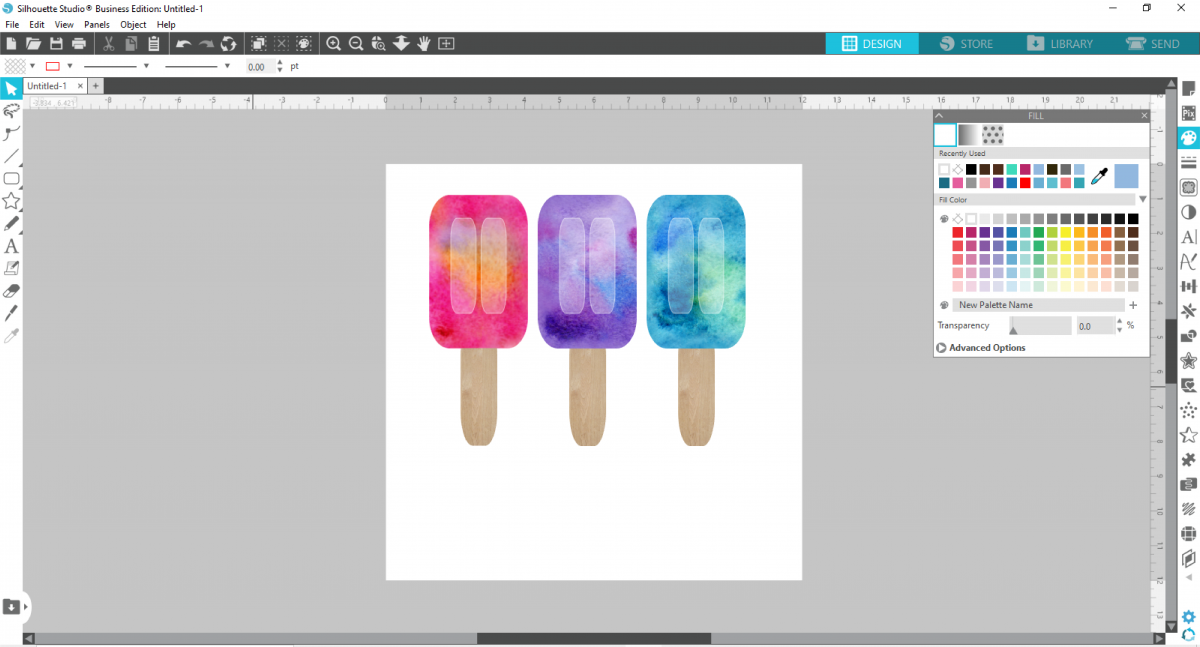
Step 5 - Use backgrounds as a fill for the design
Here you will place a watercolor background over the top of one popsicle. Make sure the background covers the entire top portion of the popsicle. Change the red outlines for the outside to white. This will help to see the line better.

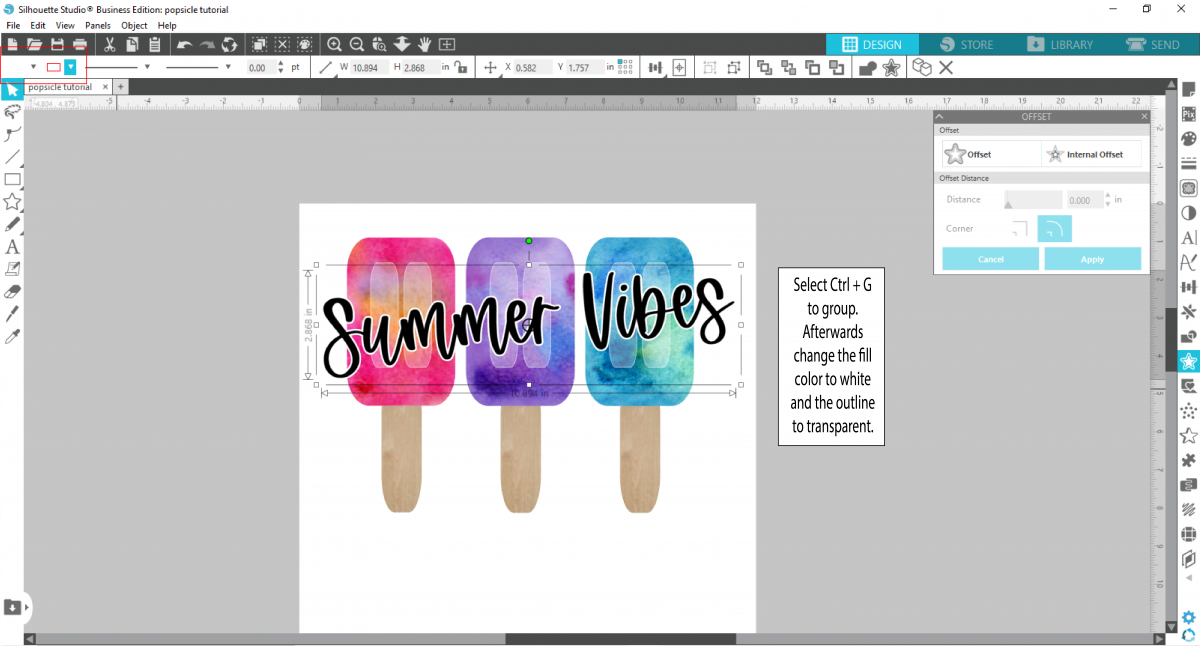
Step 6 - Add and adjust text
Create a text you would like to use. I will be using the text 'Summer Vibes' and the font Mismade. Type out the text then change the color fill and outline to black. Reposition the text over the design. You can rotate the direction however you would like.

Was this article helpful?
That’s Great!
Thank you for your feedback
Sorry! We couldn't be helpful
Thank you for your feedback
Feedback sent
We appreciate your effort and will try to fix the article